Before you begin adding a printer to your Windows computer, please download the proper print driver below:
| PRINTERS | DRIVER LINK |
| ALUMINUM, ARGON, BORON, CALCIUM, CARBON, CHLORINE, CHROMIUM, FLUORINE, IRON, LITHIUM, NEON, NITROGEN, OXYGEN, POTASSIUM, SODIUM | CLICK HERE TO DOWNLOAD THE DRIVER |
| HOLMIUM, PHOSPHORUS, SILICON |
CLICK HERE TO DOWNLOAD THE DRIVER |
| SULPHUR |
CLICK HERE TO DOWNLOAD THE DRIVER |
| HELIUM, MAGNESIUM, RUBIDIUM |
CLICK HERE TO DOWNLOAD THE DRIVER |
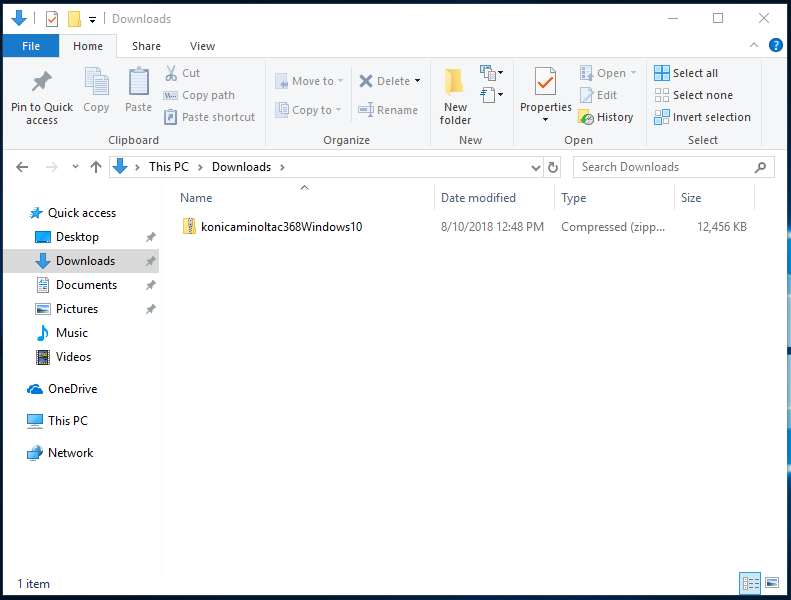
- After downloading the driver .zip file, open up File Explorer and select the Downloads folder under the Quick Access panel.
- Select the .zip file and press the Extract option under Compressed Folder Tools on the menu bar above the files.
-
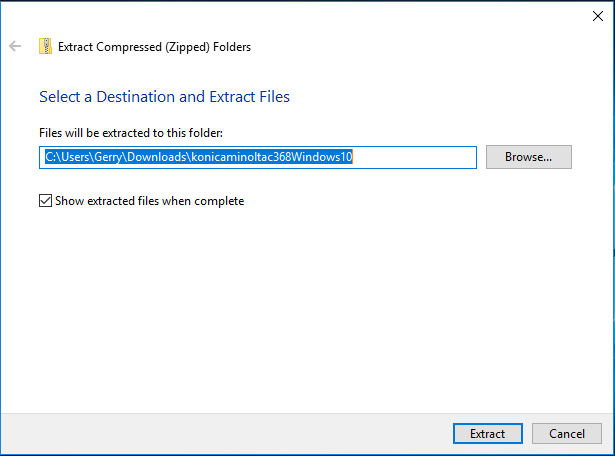
Select the Extract All menu option.
-
This will open up the Extract Compressed (Zipped) Folders dialog box. Leave the defaults selected and press Extract.
-
There will be a new window that opens that shows the extracted files.
-
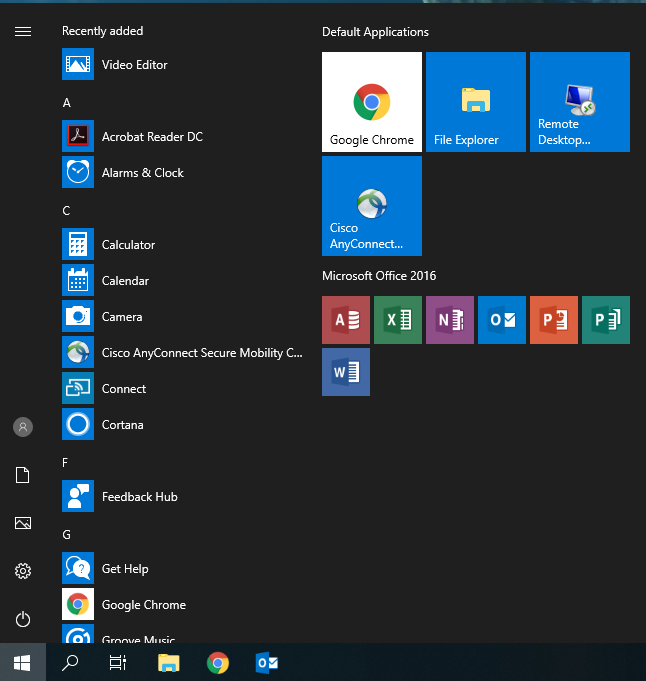
Next open up the Start Menu.
- From here you will then select the Settings Icon (the icon shaped like a gear, directly above the power options).
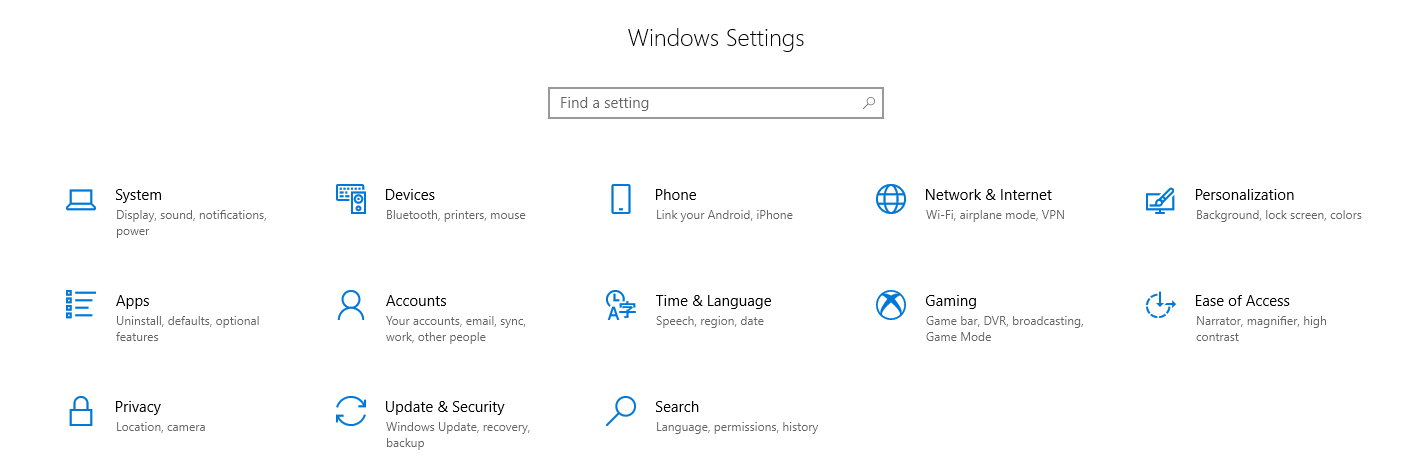
- This will open up the Windows Settings dialog.
- From here select the Devices option.
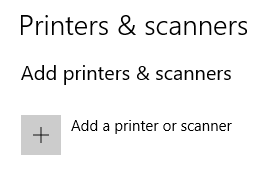
- Select the Printers and Scanners option on the left hand side of the window that opened.
- The window that opens here may already have printers populated in it from your home or other institutions. There will be an option for Add a printer or scanner near the top of the window. Select Add a printer or scanner.
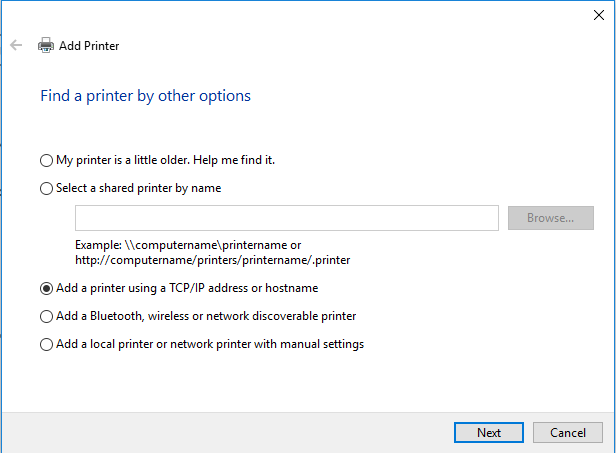
- You may see a listing of printers appear as your computer is scanning the network for devices. You can interrupt this process by selecting the The printer that I want isn’t listed option (it may take several seconds for it to appear).
- This will open the Add Printer dialog box. Select the option that reads Add a printer using a TCP/IP address or hostname. Select Next.
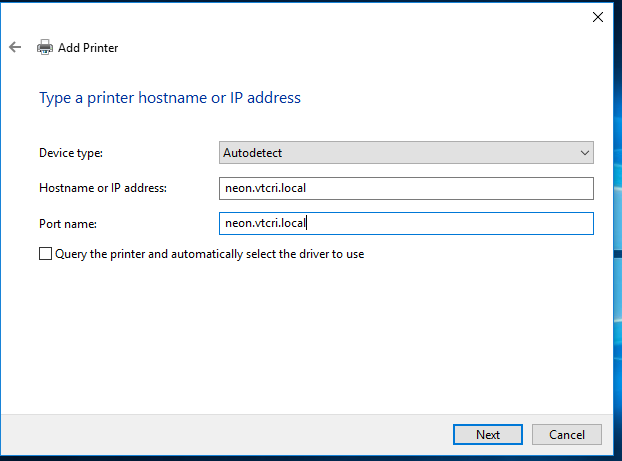
- In the new Add Printer dialog box that opens, enter in the name of the printer you are adding to your computer in the Hostname or IP Address: section. In this example we are using neon.vtcri.local. The Port Name will automatically fill in as you are typing.
- Leave the default options the same after you enter the Hostname or IP Address: and select Next.
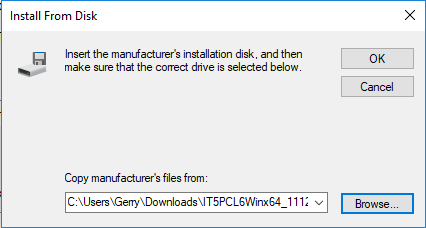
- A new Add Printer dialog will open. Select the Have Disk… option.
- In the Install From Disk dialog that opens select the Browse option.
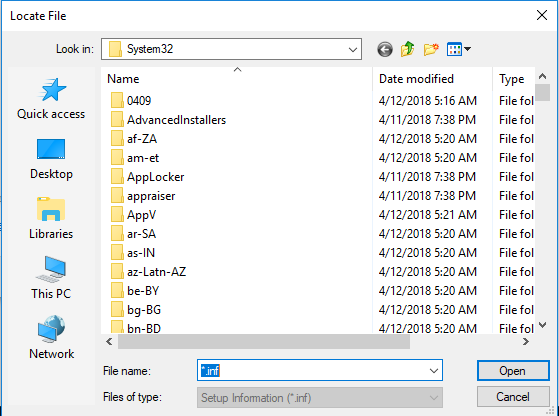
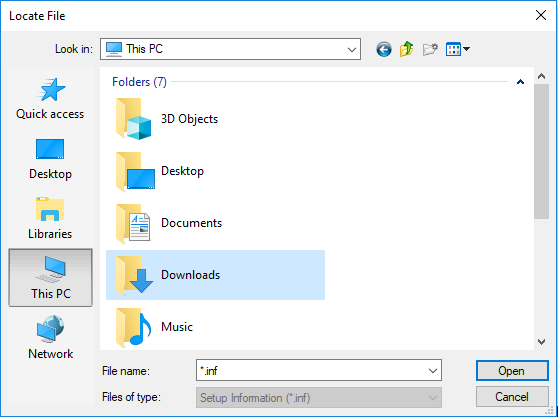
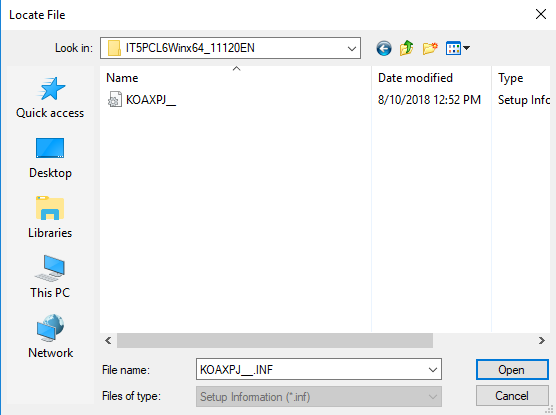
- This will open a Locate File dialog box. Select the This PC option on the left hand side of the dialog box.
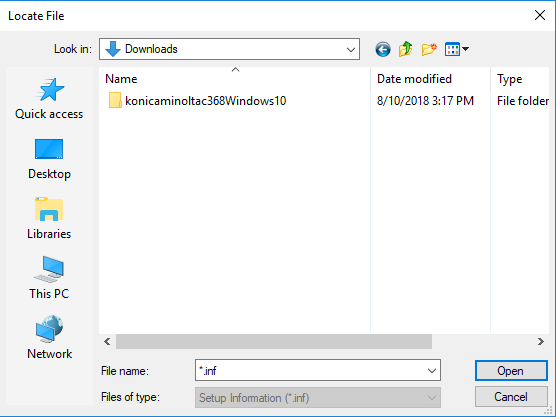
- Double-Click your Downloads folder.
- Double-click the konicaminoltac368Windows10 folder.
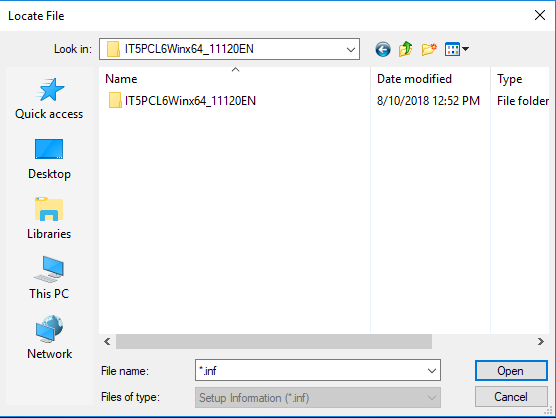
- Double-Click the IT5PCL6Winx64_11120EN folder.
- Now Single-Left-Click the KOAXPJ_ file in the Locate File dialog box and select Open.
- Now select OK from the Install From Disk dialog box.
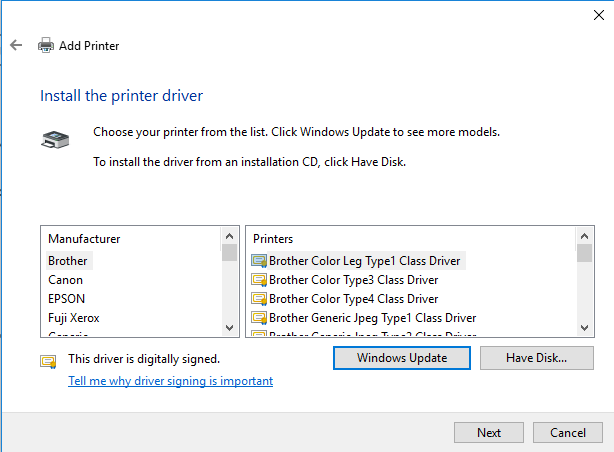
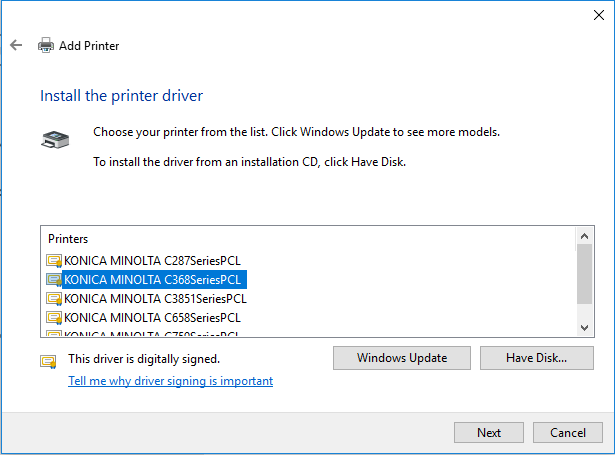
- Select the Konica Minolta C368SeriesPCL listing in the Add Printer dialog box then select Next.
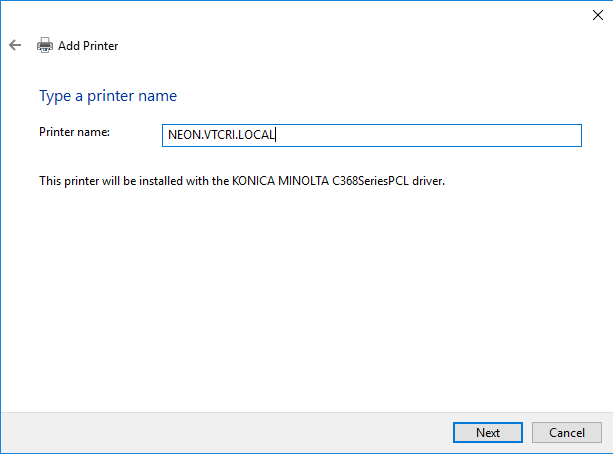
- For the Printer Name: option in the Add Printer dialog box we recommend naming it the same as the name you used in the Hosname or IP Address: section.
- In this example we used neon.vtc.vt.edu. Select Next after entering in the Printer name.
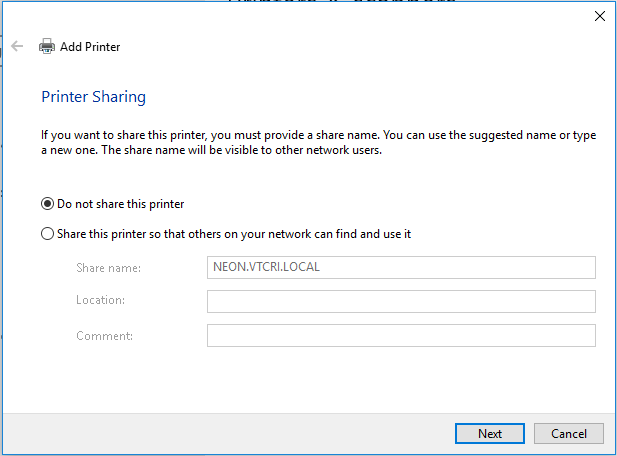
- In the new Add Printer dialog box that opens, select Do not share this printer then select Next.
- For the final step you can choose to Print a test page to ensure your connection to the printer is working. Otherwise select Finish.


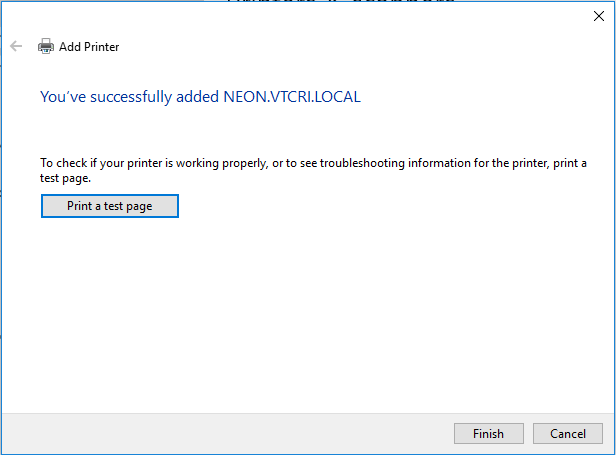
Your printer is now ready for use with the applications you need to print from. If you run into issues or have questions you can always Start a Conversation with us.
Gerald Martin
Comments