| Capacity: | 20 |
| How to Schedule: | TBMH Admin |
| Building: | Riverside 1 |
| Floor: | 2 |
| Room Number: | 205B |
| Special Instructions: | |
| Room Equipment: | Projector, Screen, Digital display, Wireless Casting, Room PC, Conference Phone, Logitech Meetup Video Conferencing Camera, Zoom |
ROOM USE INSTRUCTIONS:
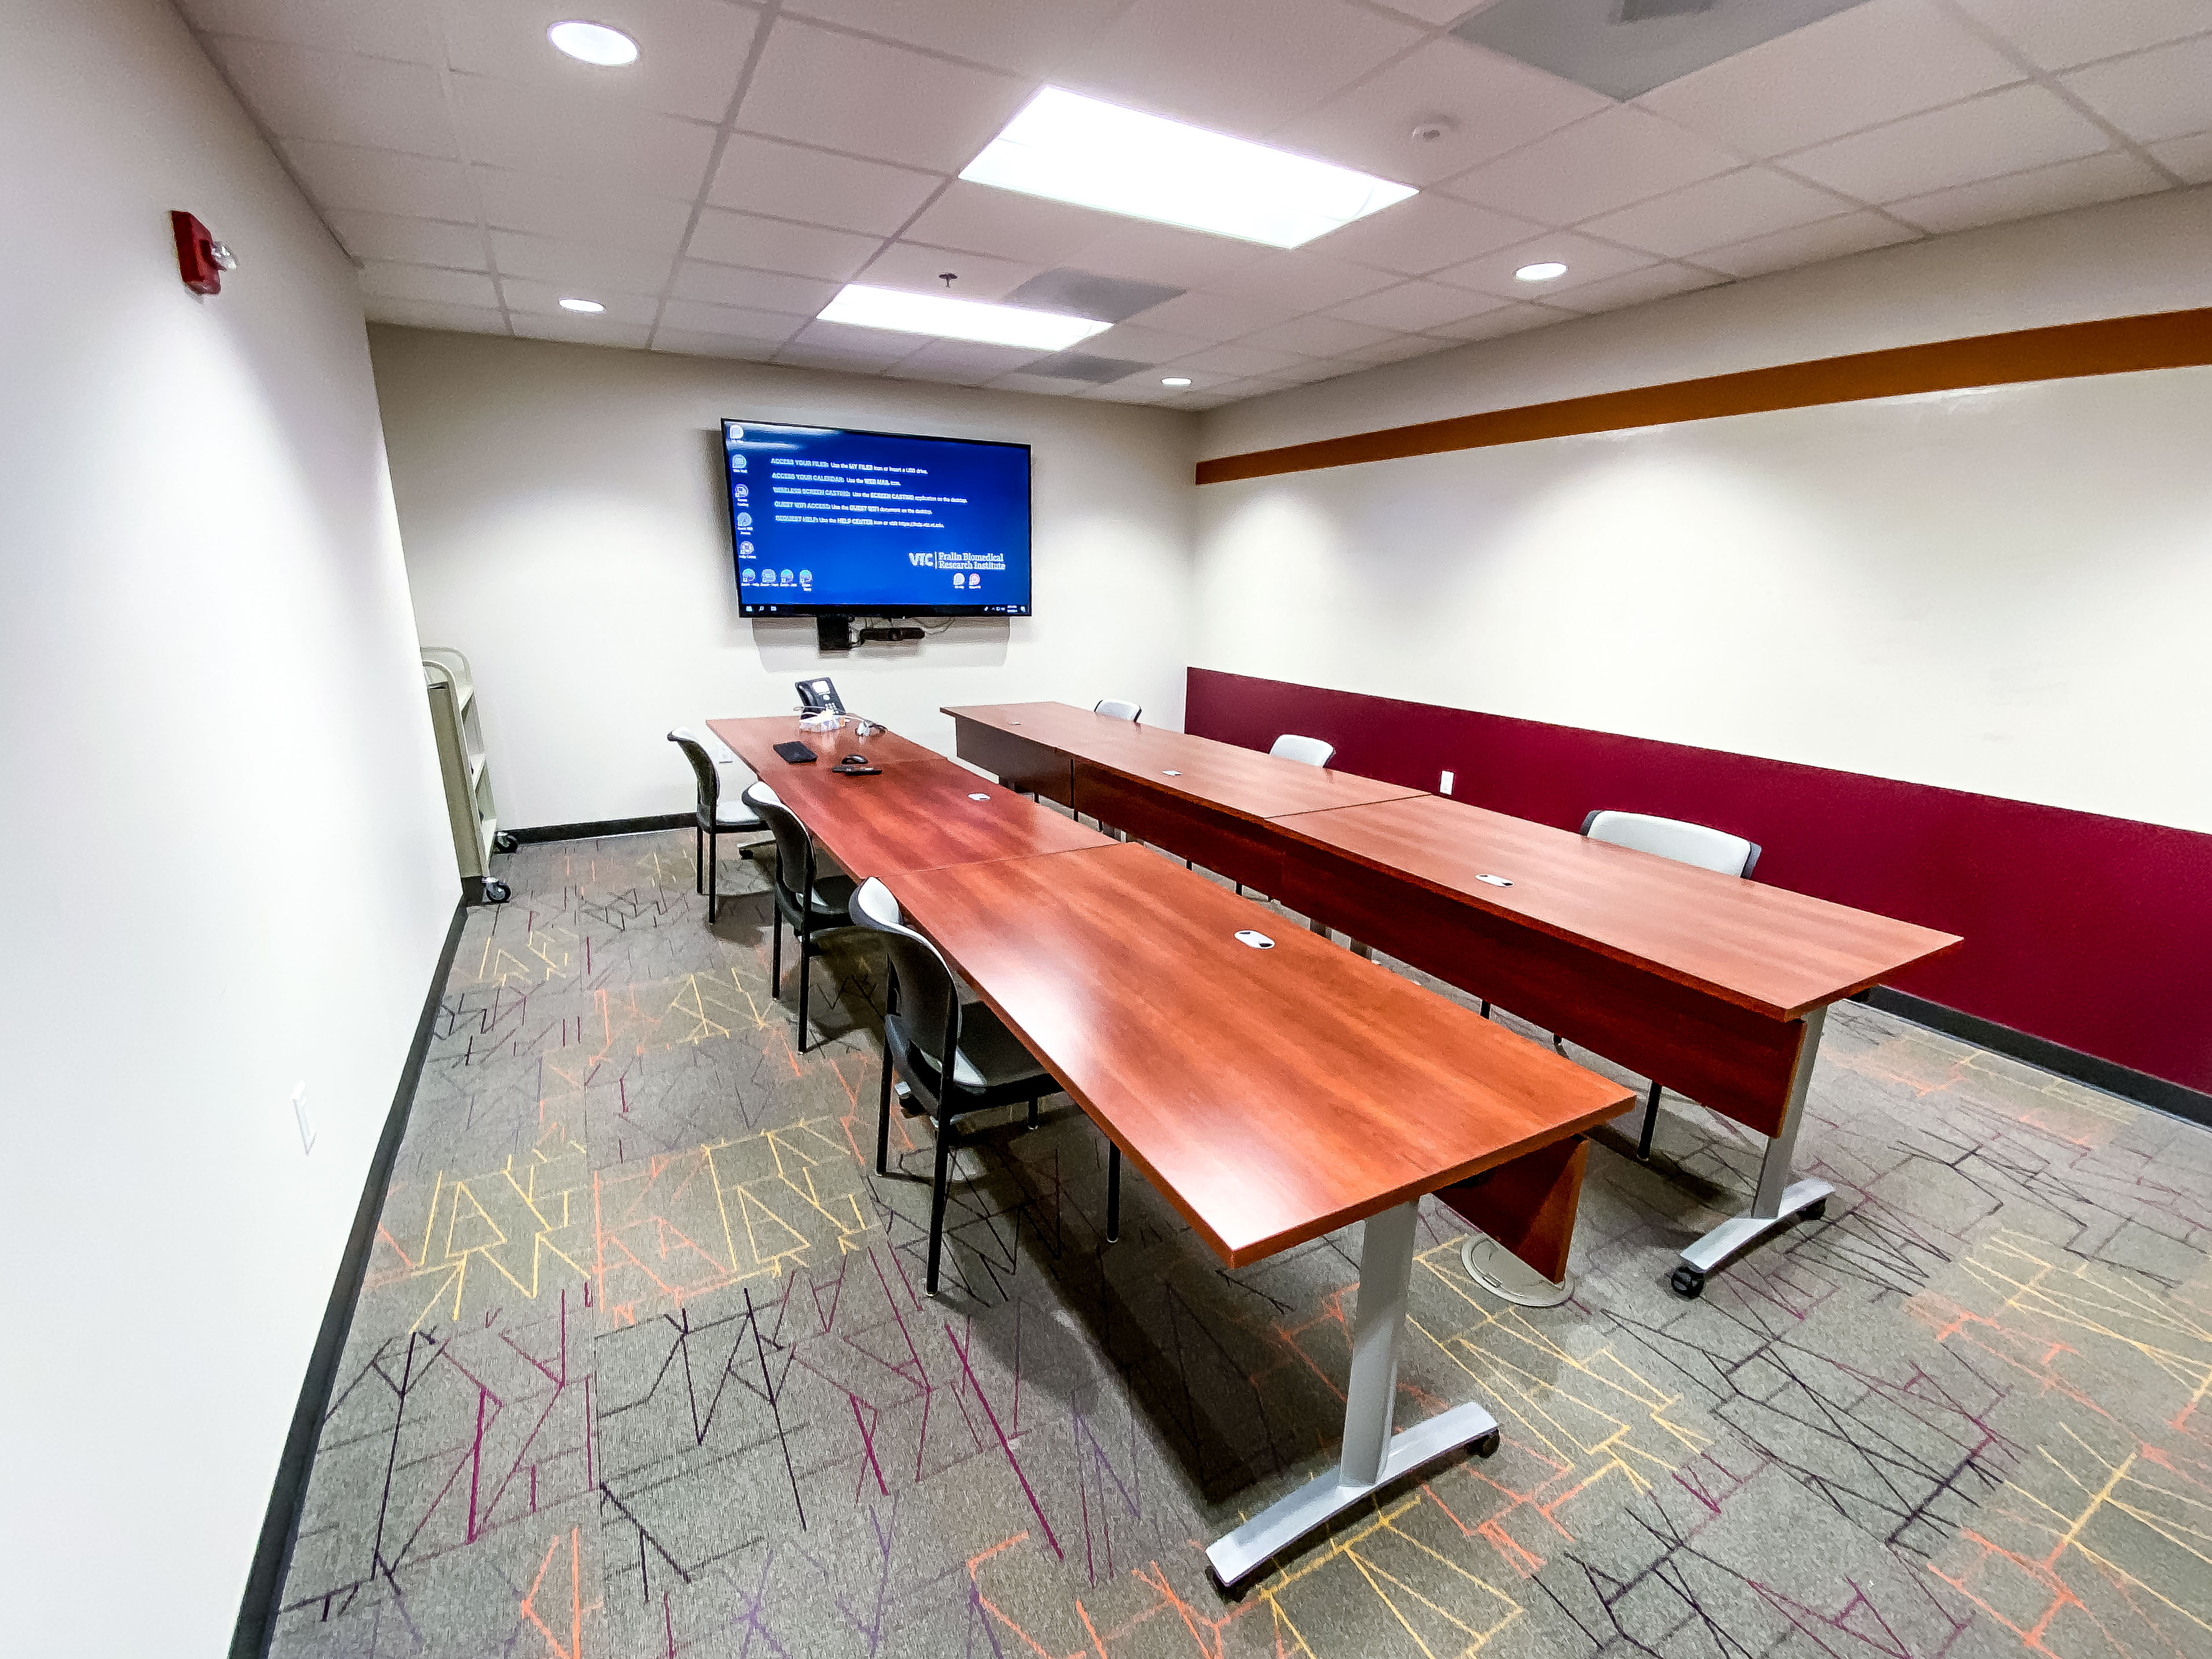
Suite 205B conference room is equipped with a large display. The room has capabilities for local presentations, videoconferencing, and conference calls.
When setting up for a presentation, you can utilize the room PC or a laptop/MacBook.
A laptop/Macbook can also be cast wirelessly to the screen using AirServer.
Video conferencing is possible from the Logitech Meetup Video Conferencing Camera connected to the room PC. Zoom is Virginia Tech's endorsed video conferencing platform.
Connecting a Laptop/MacBook to the Display:
- To connect to the display, connect your laptop/MacBook to the VGA Cable located on the table. There is power available within the enclosure in the center of the table.
For an HDMI connection ensure that the display is set to the HDMI 2 input.
For a VGA connection ensure that the display is set to the PC-IN input.
Please utilize a Mini-Displayport to VGA, or USB-C to VGA adapter to connect a MacBook. Adapters are available upon request. Please submit a request by Starting a Conversation.
Connecting the Room PC to the Display:
- The room PC is wall mounted beneath the display. Ensure that the input is set to HDMI using the display remote.
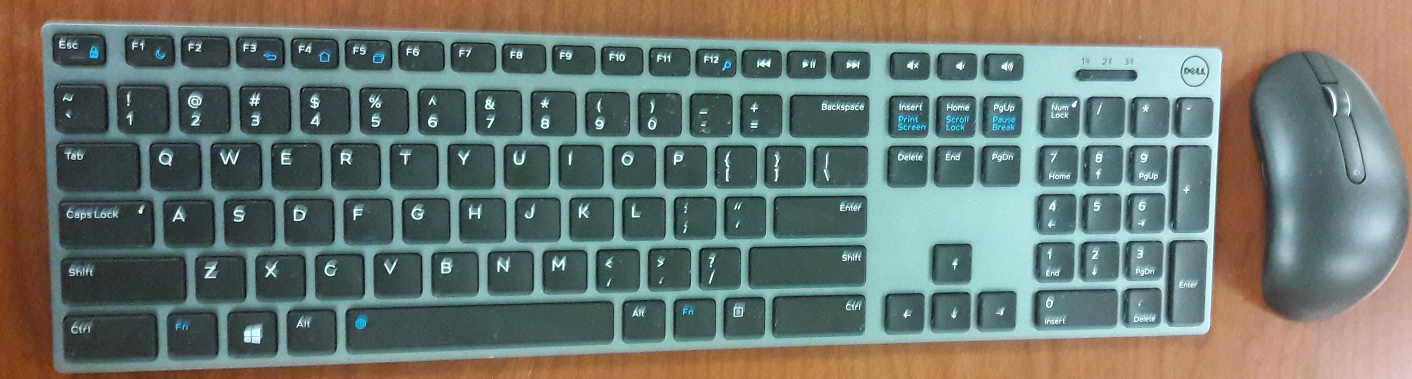
Next utilize the keyboard and mouse, located on the conference table, which are connected to the room PC.
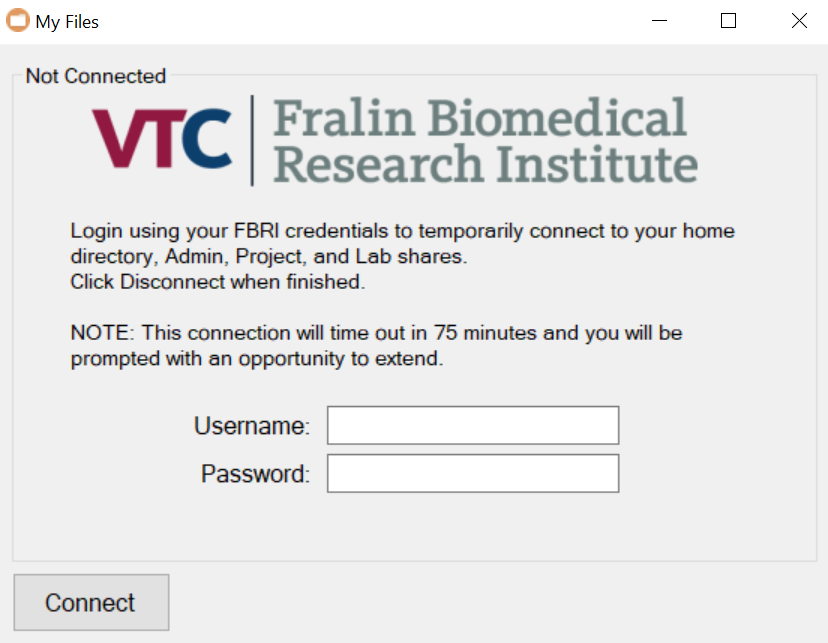
Other essential tools to note are the My Files application, which can be used to access your FBRI Network Home Directory, the Web Mail shortcut to access the web-based email client, or a flash drive to transfer presentation files to the desktop.


Within the My Files application, you will need to login with your FBRI credentials to access your FBRI Network Home Directory. By default the connection will time out after 75 minutes. Any time during your session you can extend the connection time by 60 minute intervals.
Wireless casting from a Laptop/MacBook to the projector:
First make sure that AirServer is ready on the Room PC.
Select the application named Wireless.

Mac
You can mirror or extend your Mac display using AirPlay.
To start mirroring your screen, choose the AirPlay icon in the menu bar, then choose the name of the AirServer from the menu. You can then choose to mirror your primary display by selecting Mirror Built-in Display or extend your screen by selecting Use as Separate Display.
If the Icon is not visible in the menu bar, go to System Preferences, select Displays and select the Show mirroring options in the menu bar when available checkbox.
iPhone or iPad
First make sure your device is connected to Eduroam or the cellular network. (NOTE: You may also need to connect to the FBRI VPN from your mobile device.)
Next open the Control Center on your iOS device by swiping up from the bottom or top of the screen depending on the device and iOS version. Press Screen Mirroring and then the name of the room you want to connect to. AirServer will now mirror the screen on your device.
Windows 10
To use the built-in screen projection in Windows 10 press Windows + K or swipe from the right on your touchscreen to open the Connect sidebar menu where you can select the conference room AirServer from available Miracast receivers.
AirServer supports extended screen view. Select Change Projection Mode in the Connect sidebar menu (Windows + K) and then Extend in the Project sidebar menu.
To stop casting go back to the Connect sidebar menu by pressing Windows + K and select Disconnect.
If you have any issues with the connecting please reach out for additional assistance by Starting a Conversation.
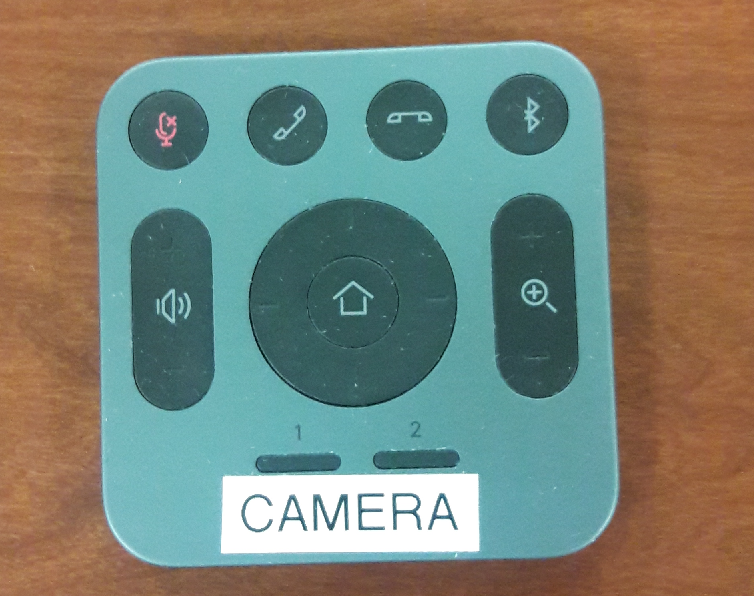
Video Conferencing:
Video conferencing is controlled from the Logitech Meetup Video Conferencing Camera connected above the room PC
You can log into your Zoom meeting by utilizing the Zoom shortcuts on the desktop.
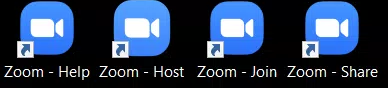
Help - Directs you to the Zoom articles that we have available at help.vtc.vt.edu
Host - Allows you to sign into your Zoom meeting to host an upcoming meeting.
Join - Allows you to join a meeting as a guest.
Share - Will connect you into a meeting with the microphone or camera disabled. This tool is used to share a presentation without causing an audio feedback from other devices around you if they are connected to the same meeting.
Once in the meeting, the Logitech Meetup Camera will be selected by default.
Please use the camera remote to make camera adjustments, as needed.
Additional Assistance:
You can request additional assistance by Starting a Conversation.
Click here to learn how to schedule this room for an upcoming meeting or event.
Brad Anglin
Comments