To publish a calendar to the internet:
- Launch Microsoft Outlook.
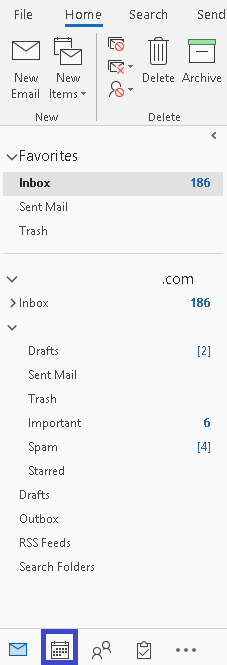
- Click on Calendar icon at the bottom.

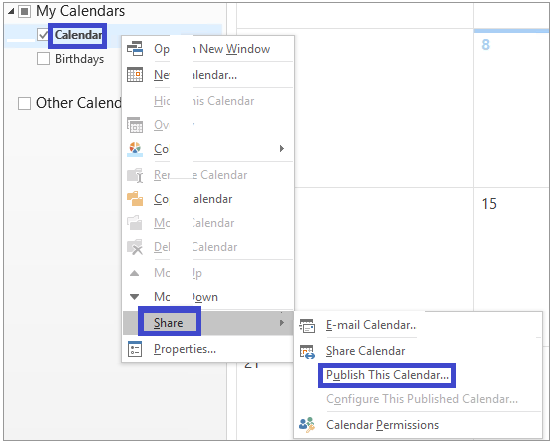
- Now, under My Calendars section, choose the calendar which you want to publish, right-click on it and then click Share>Publish This Calendar.

- Next, you need to specify the Outlook/OWA account email address and password. Click on Sign in then.
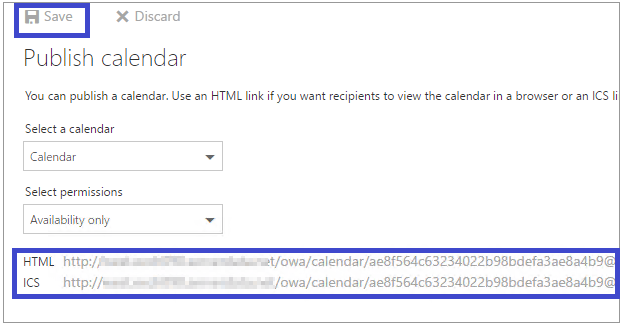
- Users can select the calendar name and specify the permission level on the calendar to be published. Under Select a calendar section, choose the calendar and under Select permissions section, choose from the Permission Levels –
- Availability Only - RECOMMENDED (showing status as free, tentative, away or busy)
- Limited details (showing status and meetings subjects)
- Full details (showing all the above details)
-
Note: Availability Only is selected as the default Permission Level and to use other Permission Levels.
- Now, you have two links generated for the Calendar – HTML and ICS.
Users are advised to copy and use the HTML link if they want the recipients to view the Calendar in a web browser.
ICS links are recommended to users who want to subscribe to this Calendar.

Click on Save to save the settings. Now, users can share these links to external users via email or other mediums.
Jed Krisch
Comments