If you have been given access to manage your own Distribution Groups (email lists / groups) in Exchange, you can add and remove users using Outlook Web Access:
To add members to the list:
- Sign into OWA (https://webmail.vt.vt.edu) using your FBRI credentials.
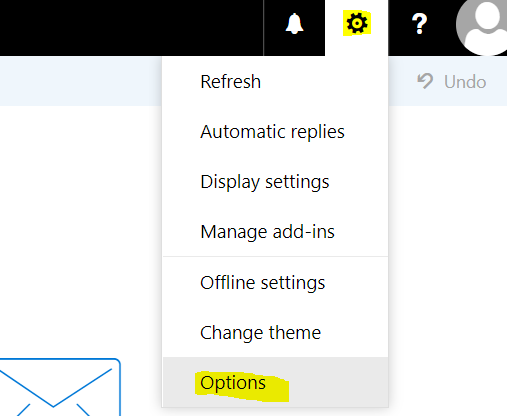
- In the upper right, select the Gear Icon then Options from the drop-down menu.
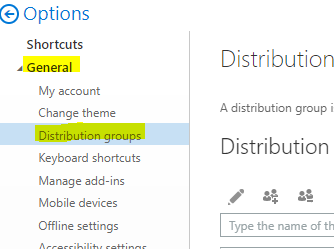
- In the left-hand sidebar of the Options page, expand General and select the Distribution Groups option.
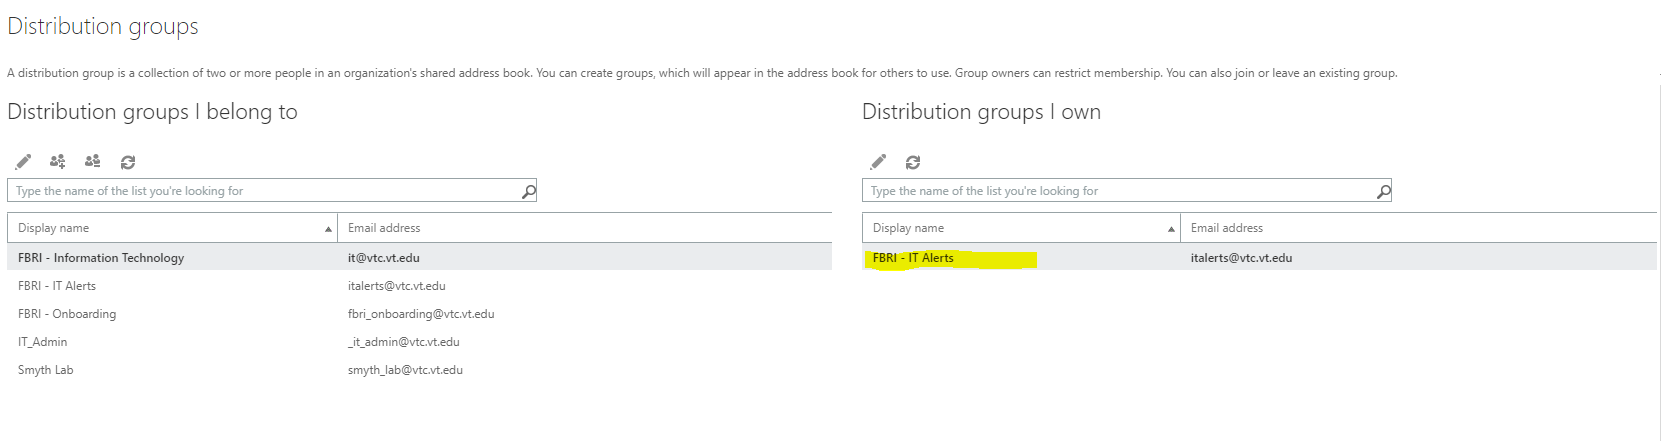
- Under Distribution Groups I Own (right-hand side of the page), double-click on the name of the group you wish to manage.
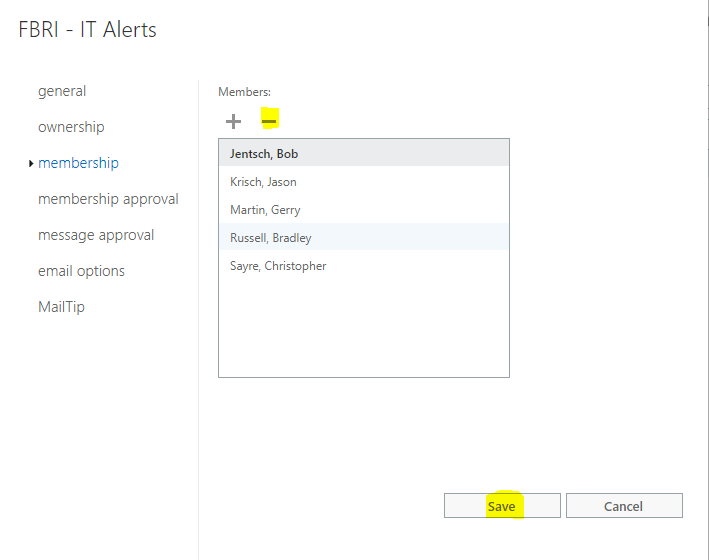
- Click Membership on the left, then click + to add new members.
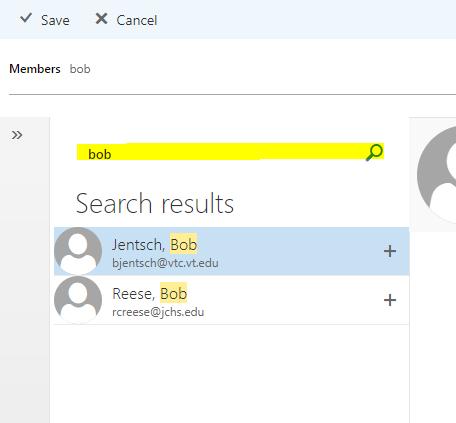
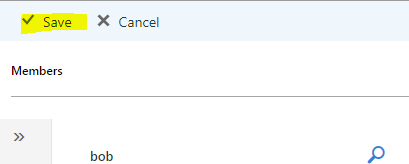
- Type in the name of the person you want to add in the field with the magnifying glass to search for users to add. The person's name should appear in the list below.
- Double-click on the person's name, or select their name from the list and click the +. The person's name will now be displayed in the field at the top.
- Repeat the previous two steps if you need to add multiple people.
- Click Save to add all the selected members to the list.


To remove members from the list using OWA:
From the Membership tab, scroll down the list and select the person you want to remove. Then click - (subtract sign.) Their name should disappear from the list. Select Save on the bottom right of the screen to commit the changes.
Jed Krisch
Comments