Windows: (see below for OSX / Mac instructions)
Scheduling an email to send later in Outlook on Windows takes only a few clicks.
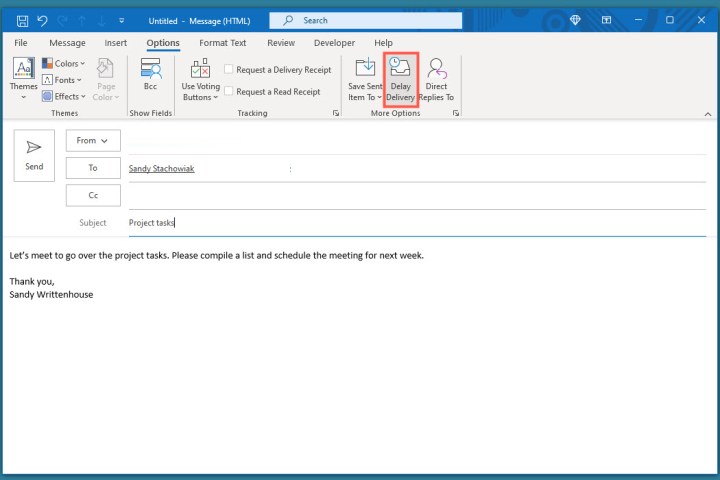
Step 1: Open Outlook on Windows and click New email or reply to an existing message.
Step 2: Compose your email, add the recipient, and enter the subject line as normal.
Step 3: Go to the Options tab in the message window and select Delay delivery in the ribbon.
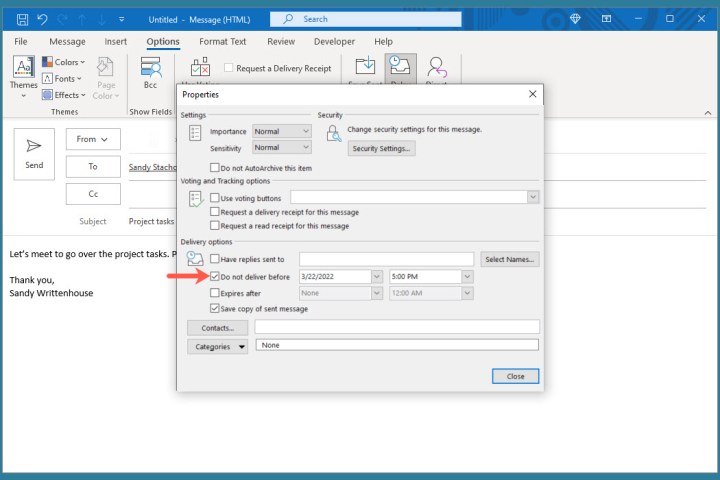
Step 4: In the Properties box that opens, go down to the Delivery optionssection. Check the box for Do not deliver before and choose the date and time to send the email.
Step 5: Click Close to exit Properties.
Step 6: You’ll return to the email window. Click Send to send the message later.
Step 7: To view, edit, or cancel a scheduled email, go to your Outbox folder.
Schedule an Outlook email on Mac
You can schedule an email in the classic or new version of Outlook on Mac the same way.
Step 1: Open Outlook on Mac and click New email or New messagedepending on your version. Alternatively, you can reply to an existing message.
Step 2: Compose your email, add the recipient, and enter the subject line as you normally would.
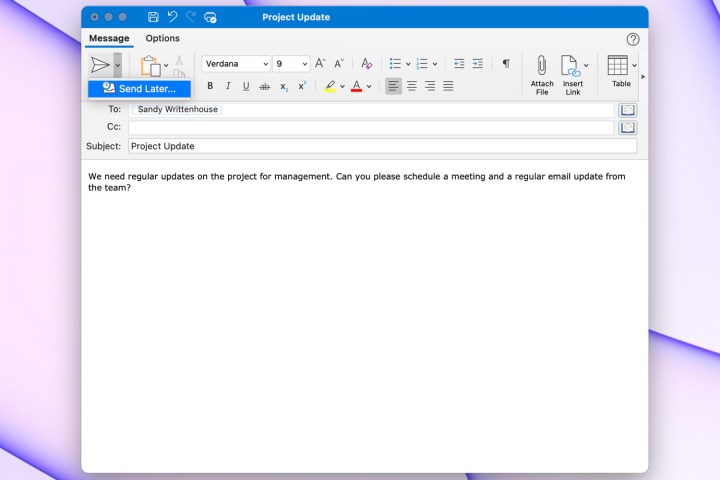
Step 3: When you’re ready to schedule the email, click the arrow to the right of the Send button at the top and choose Send later.
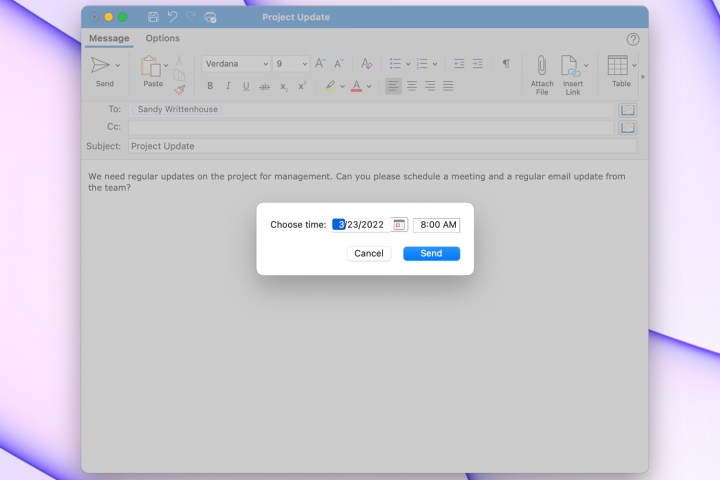
Step 4: Select the date and time and click Send.
Step 5: To view or cancel an email you’ve scheduled, head to your Draftsfolder.
Jed Krisch
Comments